

How To Move An Object In A Photo
This tutorial shows you lot how to move an image or a layer from one Photoshop document to some other. You'll learn how to copy and paste an image between documents, how to duplicate a layer, and three ways to drag and drop images betwixt documents.
When information technology comes to blending and compositing images, Adobe Photoshop is the undisputed champ. In fact, Photoshop gives us so many interesting and powerful ways to combine images that our creativity is express but past our skills and imagination. Only earlier we can commencement combining images, we first demand to know how to become multiple images into the aforementioned document. If you're new to Photoshop, blending even two photos together can seem like an impossible task. That's because Photoshop opens each epitome in its own split up document. To alloy or blended the images, they demand to be in the aforementioned certificate.
In a previous tutorial, nosotros learned all about tabbed and floating document windows in Photoshop. Nosotros also learned how to view and adjust multiple open up images on the screen using Photoshop'due south multi-certificate layouts. In this tutorial, we'll have what we've learned and explore five different ways to easily motility images betwixt documents.
What You'll Learn
We'll starting time with your basic copy and paste method. So, we'll learn how to duplicate a layer from one document into another. Finally, we'll look at three ways to drag and drop an paradigm between documents. We'll learn how to drag and driblet images between tabbed documents, between documents in a multi-document layout, and between two floating document windows. Once y'all've seen how they all piece of work, you can pick the method you similar the best! I'll be using Photoshop CC but this tutorial is fully compatible with Photoshop CS6.
This is lesson viii of 10 in our Learning the Photoshop Interface series.
Let's get started!
Opening The Images Into Photoshop
To follow along, you'll need two images. Here, I've used Adobe Bridge to navigate to the folder containing the photos I'll be using. To open them into Photoshop, I'll click on the kickoff image on the left to select it. Then, to select the 2d image also, I'll press and concur my Shift key and click on the second paradigm. With both photos selected, I'll double-click on either image to open them into Photoshop:
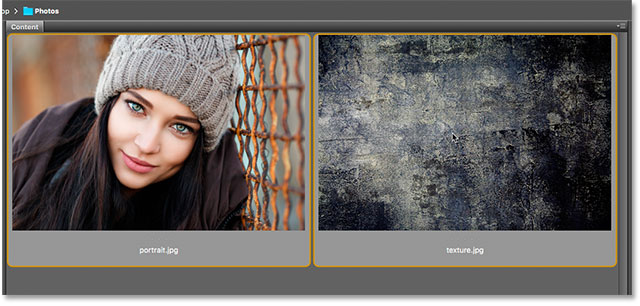
Selecting and opening two images into Photoshop from Adobe Bridge..
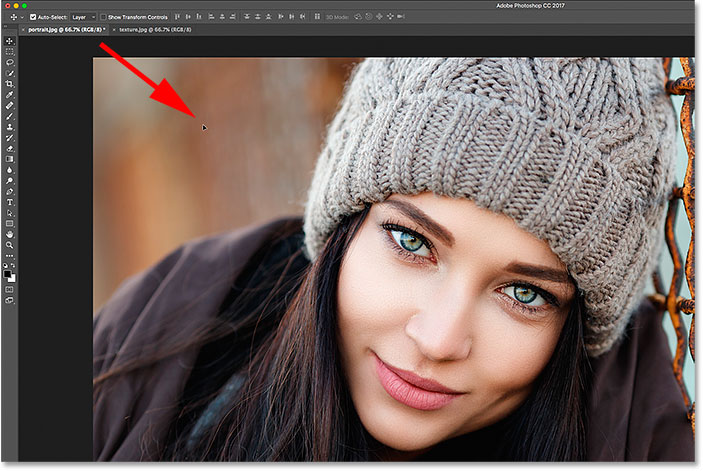
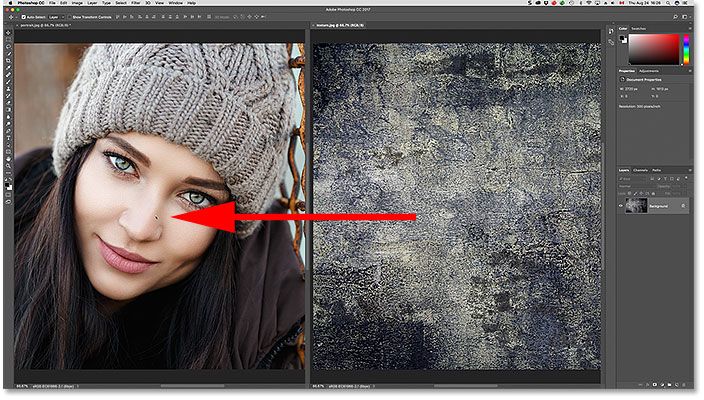
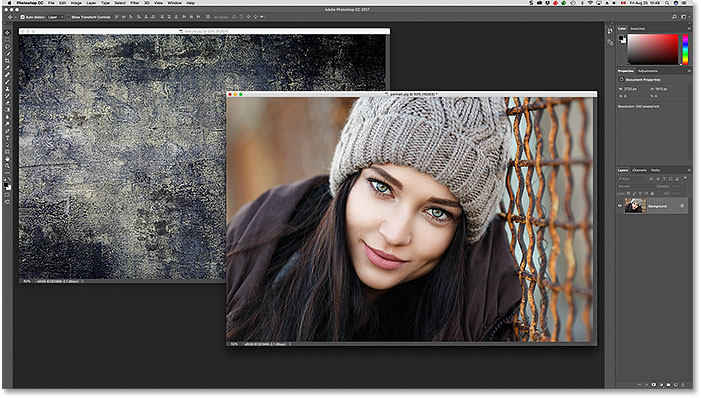
Past default, Photoshop opens the images as tabbed documents, with merely 1 document visible at a time. Here's my start epitome (portrait photo from Adobe Stock):
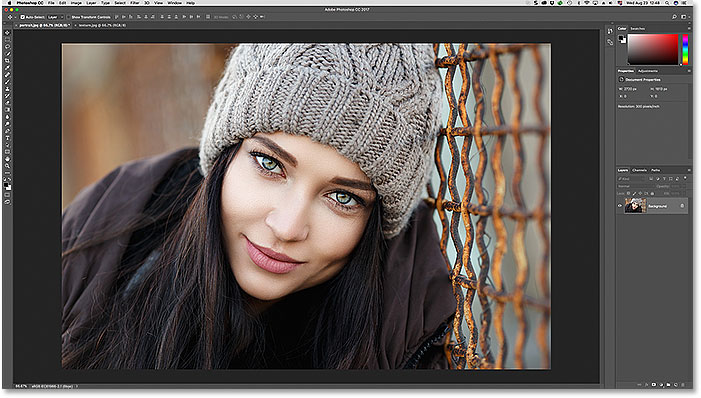
The first of two photos open in Photoshop. Photo credit: Adobe Stock.
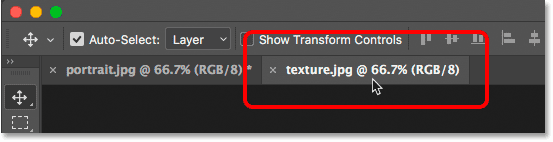
To switch between open images, we click on the tabs forth the pinnacle of the document windows. I'll switch to my second epitome by clicking its tab:
Clicking the document tab to view the 2d open image.
And now nosotros see my 2nd image. I'll utilize this image equally a texture to blend in with the original paradigm. We'll learn how to quickly blend images together at the stop of this tutorial (texture photo from Adobe Stock):
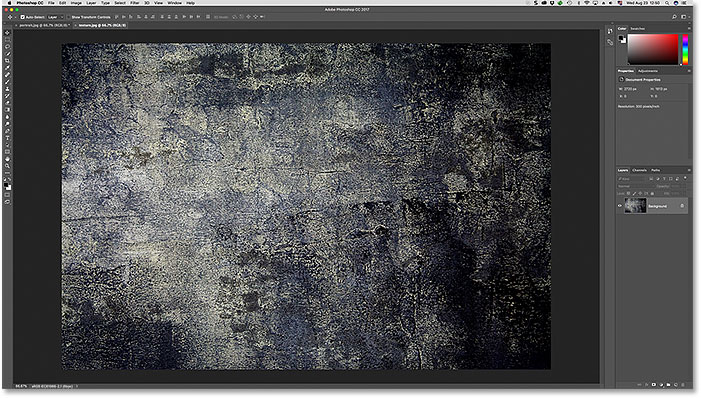
The 2d prototype. Photo credit: Adobe Stock.
How To Movement An Image Between Documents
Method one: Copy And Paste
The beginning method we'll larn for moving images between documents is how to copy and paste an image from one document into another. To copy and paste an prototype, first select the document that holds the epitome you want to move. With the document active, select the image inside the document past going up to the Select menu in the Menu Bar and choosing All. To re-create the image, get up to the Edit card and choose Re-create. Switch to the document where you lot want to paste the epitome. Then, go upwardly to the Edit carte and choose Paste. The pasted paradigm will appear on its own dissever layer above the original paradigm in the Layers panel.
Step 1: Select The Commencement Document
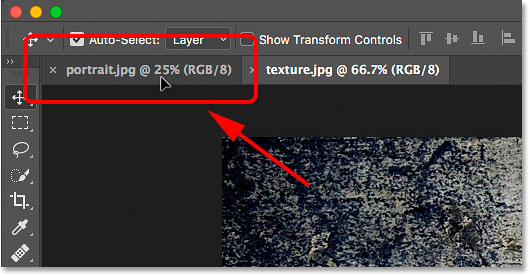
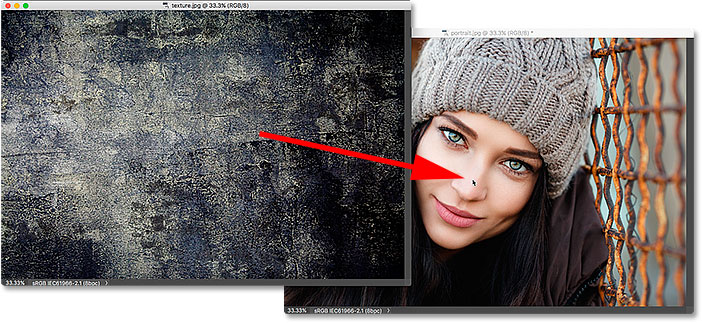
Permit's become through the steps for copying and pasting an epitome betwixt documents using my images as an case. I desire to move my texture image into the aforementioned certificate as my portrait image. And so the outset thing I'll do is select my "texture.jpg" document past clicking on its tab:
Selecting the document that holds the prototype to exist copied.
Stride 2: Select The Paradigm
To select the prototype itself, I'll go upwards to the Select carte in the Menu Bar along the acme of the screen. Then, I'll choose All. This places a option outline around my epitome, letting me know that the image is selected:
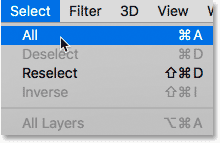
Going to Select > All.
Step 3: Re-create The Image
With the prototype selected, I'll copy it to the clipboard by going upwardly to the Edit bill of fare in the Card Bar and choosing Re-create:
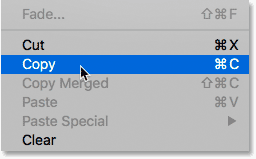
Going to Edit > Copy
Step 4: Switch To The 2d Document
Side by side, I'll switch over to my "portrait.jpg" document by clicking on its tab:
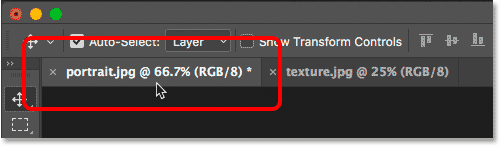
Selecting the document where I desire to paste the image.
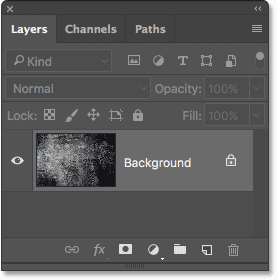
Before I paste the paradigm into the document, let's beginning look in my Layers panel. The Layers panel is where we can see all the layers in our document. We'll larn all most layers in other tutorials. For at present, notice that the image is sitting on the Background layer. The Groundwork layer is currently the only layer in the document:
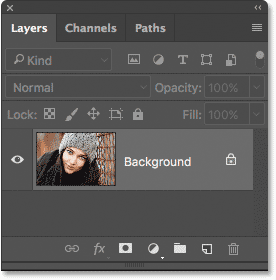
The Layers panel showing the document's original image.
Step 5: Paste The Epitome
To paste my texture image, I'll become up to the Edit bill of fare in the Menu Bar. Then, I'll cull Paste:
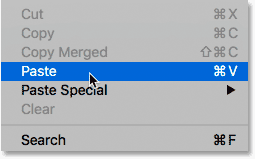
Going to Edit > Paste.
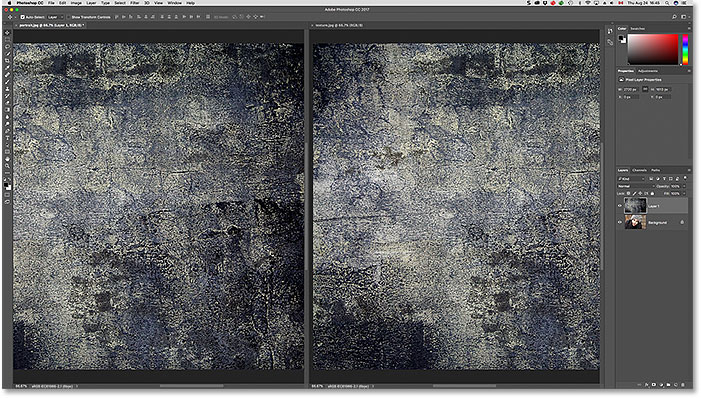
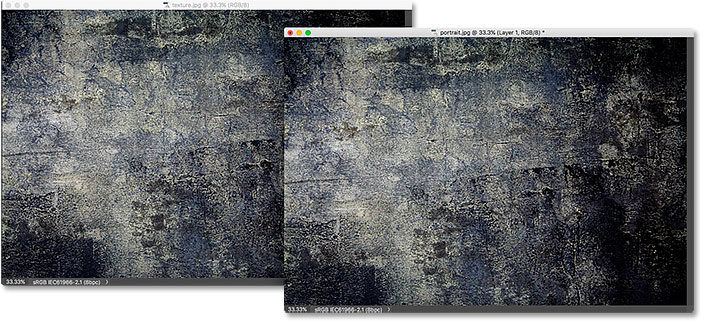
Photoshop pastes the texture image into the document. Information technology looks like my texture photo is now the only photo in the document. That's because the texture photo is sitting in front of the portrait photo. Since both photos are the same size, the texture paradigm is blocking the portrait image from view:
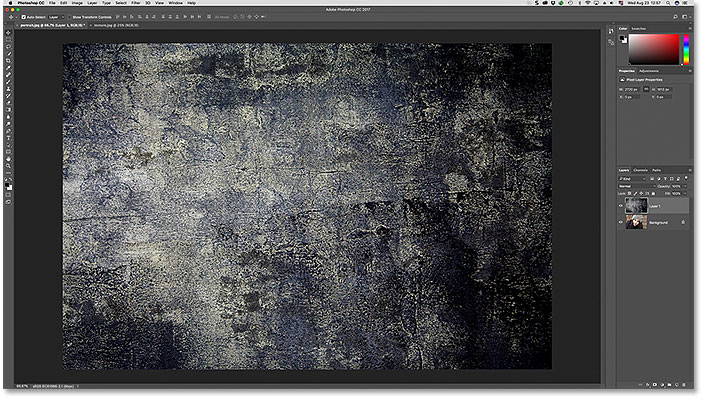
The "texture.jpg" epitome has been pasted into the "portrait.jpg" image's document.
To confirm that the document does in fact hold both images, let'south look again in the Layers console. This time, nosotros encounter that we now have non one simply 2 layers. The original portrait prototype is still sitting on the Background layer. And, Photoshop placed the texture image on a brand new layer, named "Layer one", above information technology. Sure enough, both images are now in the same document:
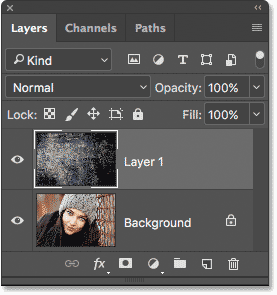
The Layers panel at present showing both images in the same Photoshop document.
Resetting The Documents
So that's the kickoff manner of moving images betwixt documents. If you desire to follow along with the next methods, you'll first need to reset your two documents dorsum to their original states. Start, we'll reset the document where y'all pasted the prototype. Brand certain the document is still active. Then, go up to the Edit menu in the Card Bar and choose Undo Paste. This removes the pasted image from the certificate, leaving you with only the original image:
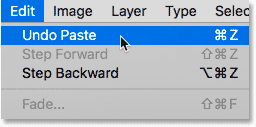
Going to Edit > Disengage Paste.
So, switch over to the document that holds the image you copied. To remove the selection outline from around the image, go up to the Select card and choose Deselect. And with that, yous're ready to motility on to the adjacent method:
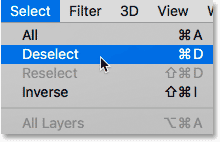
Going to Select > Deselect.
Method 2: Duplicating The Layer
Adjacent, we'll learn how to move an prototype from ane Photoshop document to another past duplicating the layer. First, make sure the document that holds the image to want to move is selected. Go up to the Layer menu in the Menu Bar and cull Duplicate Layer. In the Duplicate Layer dialog box, give the layer a name (optional). In the Destination section of the dialog box, choose the other document every bit the destination. Then, click OK. The prototype will appear on a new layer in the other document.
Step 1: Select The Document That Holds The Paradigm To Be Moved
Let's go through the steps in more detail. Beginning, since I want to move my texture epitome into the portrait photo's document, I'll select my "texture.jpg" certificate past clicking its tab:
Selecting the document that holds the image to exist moved.
If we look in the Layers console, we see my texture image sitting on the Groundwork layer. This is the layer we're going to duplicate:
The Layers panel showing the texture photo.
Step 2: Select "Duplicate Layer" From The Layer Menu
To duplicate the layer, I'll go up to the Layer menu in the Card Bar. And so, I'll choose Duplicate Layer:
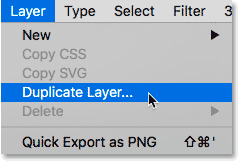
Going to Layer > Indistinguishable Layer.
Step three: Set up The Other Document Equally The Destination
This opens Photoshop's Duplicate Layer dialog box. At the top of the dialog box, it shows the name of the layer you'll be duplicating. In my case, it'south the Background layer. By default, Photoshop simply adds the discussion "copy" to the end of the layer's original name. This will go the name of the layer ("Background re-create") when it's moved into the other document. But you tin requite the duplicate layer a more descriptive name. Since this layer holds my texture paradigm, I'll change the layer's proper name to "Texture".
In the Destination section, choose the document you want to move the image into as the destination. I'll cull my "portrait.jpg" document. When y'all're gear up, click OK. Photoshop duplicates the layer and sends it over to the other document:
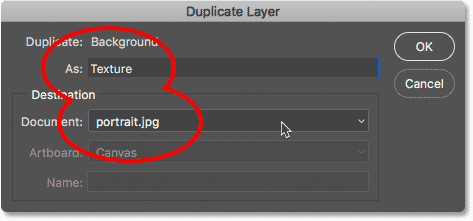
Setting the other document as the destination for the layer.
Step iv: Switch To The Other Document
I'll switch over to my "portrait.jpg" document by clicking its tab:
Clicking the tab to switch documents.
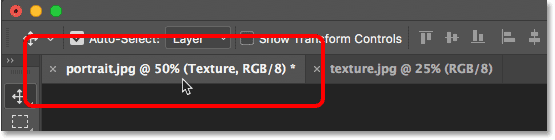
And if we await in the Layers panel, we see my "Texture" layer, which holds my texture epitome, at present sitting to a higher place the portrait photograph on the Groundwork layer. Both images are at present in the same document:
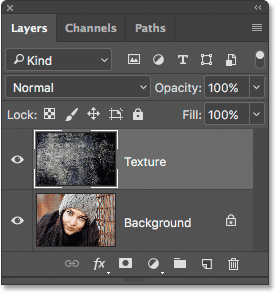
The texture layer has been duplicated into the portrait certificate.
Related: How to open up multiple images as layers in Photoshop
Resetting The Certificate
Again if you're following along with each method, yous'll need to reset your documents before you continue. This time, the only document nosotros need to reset is the one we moved the image into (in my case, the "portrait.jpg" certificate). To remove the duplicate layer from the document, get up to the Edit menu in the Menu Bar and cull Undo Duplicate Layer:
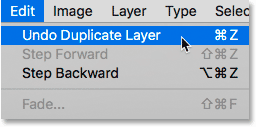
Going to Edit > Undo Duplicate Layer.
Method 3: Drag And Drop Between Tabbed Documents
The next few ways we'll expect at for moving images betwixt documents all involve dragging and dropping the epitome. We'll start by learning how to drag and drop an image between tabbed documents. First, select the document that holds the image you want to move. Select the Motion Tool from the Toolbar. Click on the epitome and drag it up and onto the tab of the other document. Wait for Photoshop to switch documents. Then, elevate the image from the tab down into the document window. Press and agree your Shift key and release your mouse button to drop and center the image in the document.
Footstep 1: Select The Document With The Paradigm Yous Want To Movement
One time once more, I'll start by selecting the document that contains my texture image. I'll exercise that by clicking on the document tab:
Selecting the "texture.jpg" certificate.
Stride 2: Select The Move Tool
To drag and drop the image, we'll need Photoshop's Motility Tool. I'll select the Movement Tool from the Toolbar forth the left of the screen:
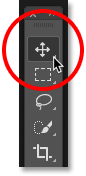
Selecting the Move Tool.
Step 3: Drag The Image Onto The Other Document's Tab
With the Move Tool in hand, I'll click on my texture prototype. Then, I'll drag information technology up and onto the tab for my "portrait.jpg" document:
Clicking and dragging the texture image onto the portrait document's tab.
Step iv: Drag From The Tab Into The Certificate
Keep your mouse push button held downward and your mouse cursor directly over the tab until y'all meet Photoshop switch documents. In my case, I'll wait for it to switch from my texture image to my portrait image. And then, I'll drag the texture image from the tab down into the portrait document's window:
One time Photoshop switches documents, elevate the image into the certificate.
Pace 5: Release Your Mouse Push
To driblet the image into the document, I'll press and hold my Shift cardinal. Then, I'll release my mouse button. The Shift central tells Photoshop to center the prototype within the document. If you don't need to middle the image, release your mouse button without holding Shift. If you expect in your Layers panel, you'll come across that both images are now in the same document:
Concord Shift and release your mouse button to drop and center the image.
Resetting The Document
Let's reset the document then we can move on to the quaternary method. To remove the image that you lot dragged into the certificate, go up to the Edit menu and choose Undo Drag Layer:

Going to Edit > Disengage Drag Layer.
Method 4: Elevate And Driblet Using A Multi-Document Layout
We've seen how to elevate and drop between two tabbed documents. Now permit's learn how to drag and drop an image betwixt documents using one of Photoshop'southward multi-document layouts. We learned all about multi-document layouts in the previous tutorial.
Go up to the Window menu in the Menu Bar, choose Accommodate, and then choose the 2-upwards Vertical layout. This places your ii documents adjacent on the screen. Select the Move Tool from the Toolbar. Click on the image yous want to motion and drag it into the other document window. Press and hold Shift and release your mouse push button to drop and centre the paradigm in the certificate. Go up to the Window card, cull Accommodate, then choose Consolidate All to Tabs to switch back to the default tabbed document view.
Stride 1: Select The "ii-up Vertical" Layout
I'll kickoff by going up to the Window menu in the Menu Bar and choosing Suit. From in that location, I'll select the 2-upward Vertical layout:
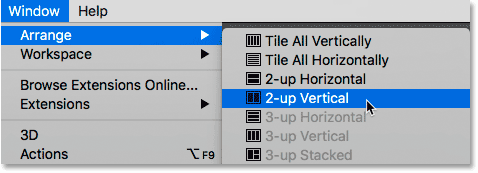
Going to Window > Suit > 2-upward Vertical.
This places both of my documents side by side each other, allowing me to see both images at once:
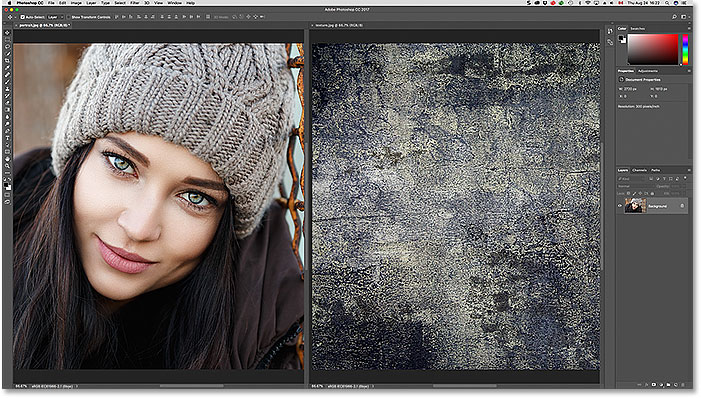
Both images are now visible on the screen.
Step 2: Select The Move Tool
Next, I'll select the Motility Tool from the Toolbar:
Selecting the Move Tool.
Step three: Click And Drag The Image Into The Other Document
With the Motion Tool selected, I'll click on my texture image and, with my mouse push held downwardly, I'll drag it into the portrait photograph'southward document window:
Dragging the texture photo into the other certificate beside it.
Footstep iv: Release Your Mouse Push
To drop and center the texture paradigm, I'll press and concord Shift, then I'll release my mouse button. Photoshop copies the texture paradigm from its original certificate into the portrait certificate:
Dragging the texture photograph into the other certificate abreast it.
Step 5: Choose "Consolidate All to Tabs"
To switch your view from the "2-upwardly Vertical" layout back to the default, tabbed document view, go upward to the Window card, choose Arrange, and then choose Consolidate All to Tabs:
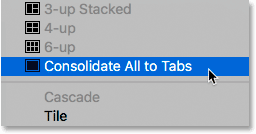
Going to Window > Adapt > Consolidate All to Tabs.
And now we're dorsum to the default view, with both images in the same document:
Dorsum to the default tabbed certificate view.
Resetting The Document
Once once more, to reset the certificate dorsum to its original state so we can look at the terminal manner of moving images between documents, go upwardly to the Edit carte du jour and cull Undo Drag Layer:
Going to Edit > Disengage Drag Layer.
Method v: Elevate And Drop Between Floating Windows
Finally, let's learn how to move an epitome from one document to another in Photoshop past dragging information technology between two floating windows. Go up to the Window menu, cull Adapt, and then choose Float All in Windows. Both images will be visible inside their own floating document. Select the Move Tool. Click inside the window of the prototype yous want to move and elevate it into the other window. Press and hold Shift and release your mouse button to drop and center the image inside the document. To revert dorsum to the tabbed certificate view, go up to the Window menu, choose Arrange, and so cull Consolidate All to Tabs.
Stride one: Bladder All in Windows
To switch my view from tabbed documents to floating windows, I'll go upward to the Window card and choose Adapt. Then, I'll choose Bladder All in Windows:
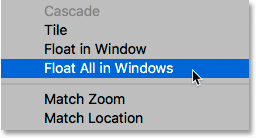
Going to Window > Arrange > Float All in Windows.
This places each image within a floating certificate window. Click on the gray tab expanse along the elevation of the windows to drag and reposition them on the screen so that it's like shooting fish in a barrel to elevate an image from ane window to the other:
Each photograph appears in its own floating window.
Stride 2: Select The Move Tool
Next, I'll select the Move Tool from the Toolbar:
Selecting the Move Tool.
Footstep three: Elevate The Image Into The Other Floating Window
With the Motility Tool selected, I'll click on my texture image and drag it into the window that holds my portrait prototype:
Dragging the image from 1 window into the other.
Pace 4: Release Your Mouse Push button
To driblet and center the image within the portrait certificate, I'll press and hold my Shift fundamental, then I'll release my mouse button:
The texture photo now appears in both windows.
Footstep 5: Switch Back To The Tabbed Documents View
With both images now in the aforementioned certificate, I'll switch from floating windows back to tabbed documents by going up to the Window card, choosing Arrange, and and so choosing Consolidate All to Tabs:
Going to Window > Arrange > Consolidate All to Tabs.
Both images are now in the same tabbed document:
Back to the tabbed document view once again.
Blending The Images Together
Now that we know how to move images into the same Photoshop certificate, how practise we blend them together? At the moment, my texture image is completely blocking my portrait photograph from view. To blend the 2 images, we tin can utilize one of Photoshop's layer blend modes. I'll go through this quickly here, only yous can acquire more about blending images in our How To Blend Textures With Photos tutorial.
If we look in my Layers console, we meet my texture image (on "Layer ane") sitting above my portrait image (on the Background layer). The reason the texture is blocking the portrait from view is because the texture layer'due south alloy mode is currently set up to Normal. The Alloy Way choice is found in the upper left of the Layers panel:
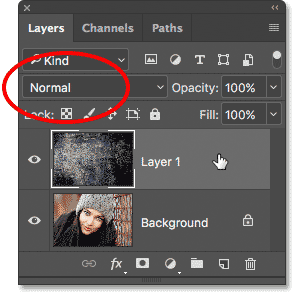
The blend way for the texture layer is set to Normal.
The Normal blend way is Photoshop's default blend mode. "Normal" means that the layer is non blending at all with the layer below it. To blend my texture in with the portrait image, all I need to do is change the blend style to something different. I'll click on the word "Normal" to open a list of other alloy modes. You tin try out the different blend modes with your images to encounter which one works all-time. I'll go with Soft Lite:
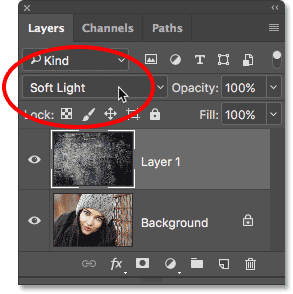
Changing the blend manner of the texture layer to Soft Light.
And here nosotros meet that just by changing the blend mode from Normal to Soft Lite, my texture now blends in nicely with the portrait, creating an interesting result. You can learn even more near blend modes, including tips for easily switching betwixt them, in our Flip, Mirror and Rotate Designs and Patterns tutorial:

The event afterward changing the alloy mode of the texture layer to Soft Calorie-free.
Where to get next...
And there we have it! That'due south 5 easy ways to move an prototype between documents in Photoshop, along with a quick look at how to blend your images together using blend modes! In the next lesson, we'll acquire how to use workspaces in Photoshop!
Yous tin jump to any of the other lessons in this Learning the Photoshop Interface affiliate. Or visit our Photoshop Basics section for more than topics!
Source: https://www.photoshopessentials.com/basics/5-ways-move-images-photoshop-documents/
0 Response to "How To Move An Object In A Photo"
Post a Comment